- sales@agenciaroco.com
- +57 319 6592501
- +57 319 6592501
- Request free consultation
If you have arrived here it is because you have encountered this great dilemma of how to configure your ftp server behind a NAT router with dynamic IP. Let's start by explaining what happens here:
FTP is a protocol for file transfer or as its acronym in English says, File Transfer Protocol. This protocol is very useful mainly when we want to send files to an external server, such as to implement an application, a web page or when we want to make backups of our servers either on our computer or on NAS systems (we will discuss these systems in another Post ).
Now, FTP uses the client-server model, our computer or that of a user communicates (from now on customer) with an external server. In the image below you can see how the client interacts with the FTP server.
This is where the problems begin, if the client is going to communicate with your server, it requires an IP to locate it, however, the server, being behind a NAT router, assigns a single public IP to all computers on the local network. So, how do we ensure that when contacting the public IP address it is directed exclusively to the computer that we have as an FTP server within our local network? This is where the NAT router comes in to do its job, but we will configure it later. For now, we are going to first configure our FTP server using Filezilla server.
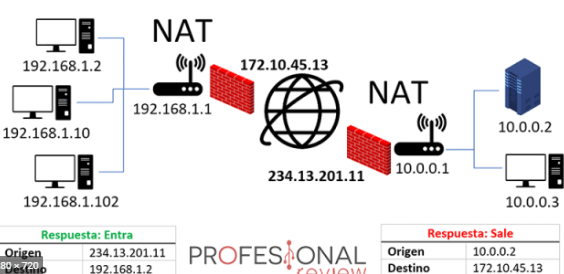
On our computer we are going to configure the FTP server, for this we use filezilla server. On the Internet you will find more options such as Titan FTP Server, Serv-U FTP Server, among others, but Filezilla is the one that has taken its strongest place.
First we install it in the folder we define, leave the default options and enter an administrator password. Once installed you will find a screen like the following:
To enter our new server we leave the default options and enter the password created when installing the program:
localhost To connect to our computer (127.0.0.1)
Port 14147 To enter the administrator port
When we connect, depending on the case, several warnings will appear. The most commons are “You appear to be behind a NAT router. Please configure the passive mode settings and forward a range of ports in your router.” and “FTP over TLS is not enabled, users cannot securely log in” and NAT router”. The first warning is the one that we are going to address in this article because without solving it the client will not be able to communicate with our computer. The second warning is telling us that the communication is not done through FTPS therefore it is not secure, we will address it in another Post.
To understand the first warning we have to know how our computer's communication with the network works.
We are going to create a group to which we are going to give access to our FTP server. Just click on the add button, write the name and activate the Enable access for users inside group box.
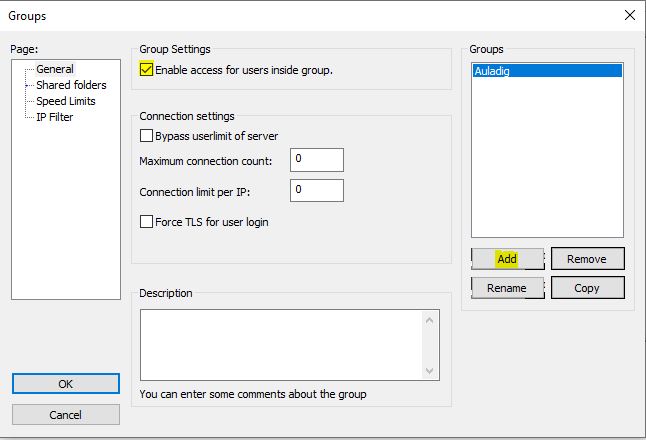
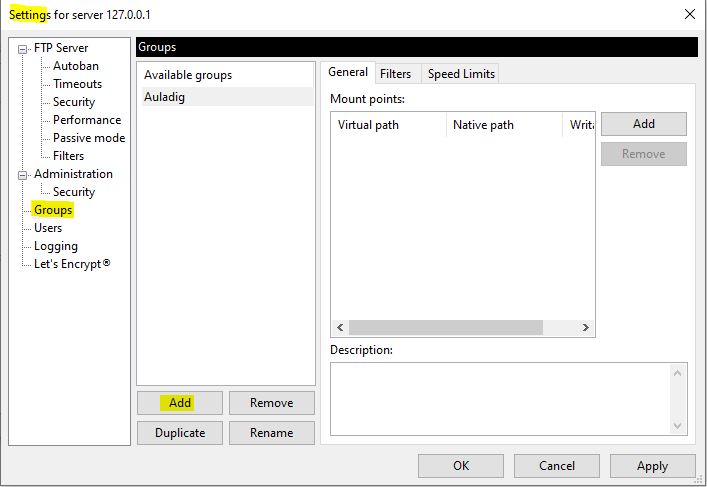
Once created, we must configure which folder we are going to give access to to the users who belong to this group. To do this, we go to the shared folders option in the left menu, select the created group and click on the add button (below directories), there we must select the folder that we want to share via ftp and select the permissions that we are going to give it.
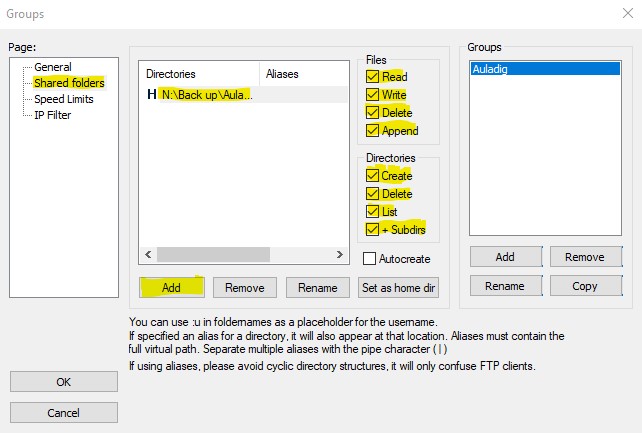
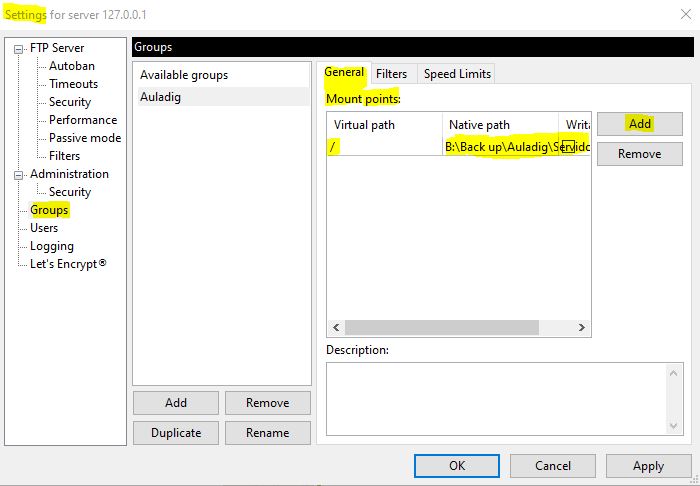
Finally we are going to add an extra layer of security to restrict access to our server. We will only allow our client's IP to access. In our case we are configuring an FTP server to make backups so we have the client's IPs quite well defined. To block all incoming connections we will write a * and exclude in the following box the IPs that we want to allow in the connection, we finish by clicking OK:
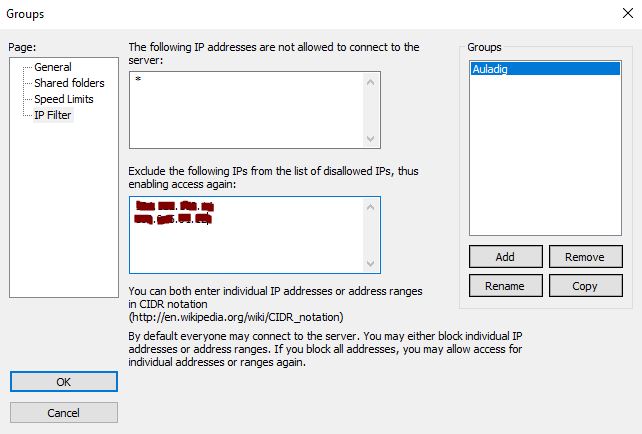
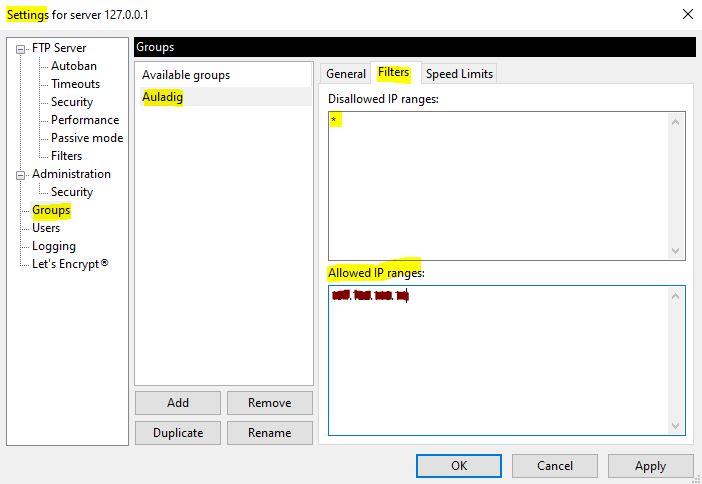
Once the group is created we are going to create the users. We go to the users section, click on Add, write a name and select the group to which it belongs, then we enable the account and write a password. In the case of Filezilla v1.1, it is important to note that the folder management changed a little, it is necessary to select a virtual path, otherwise it will send us an error “Virtual path must be absolute”, to solve it just put “/”.
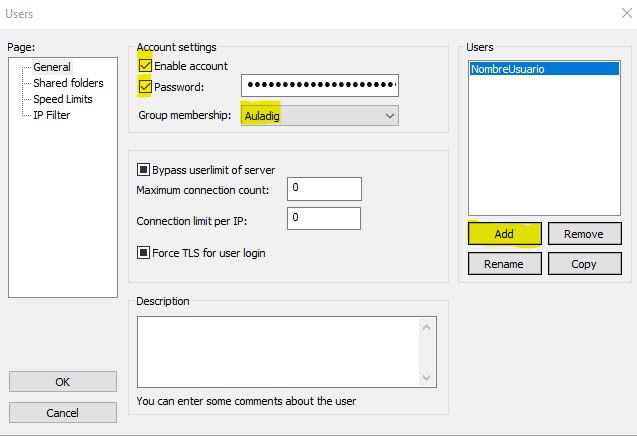
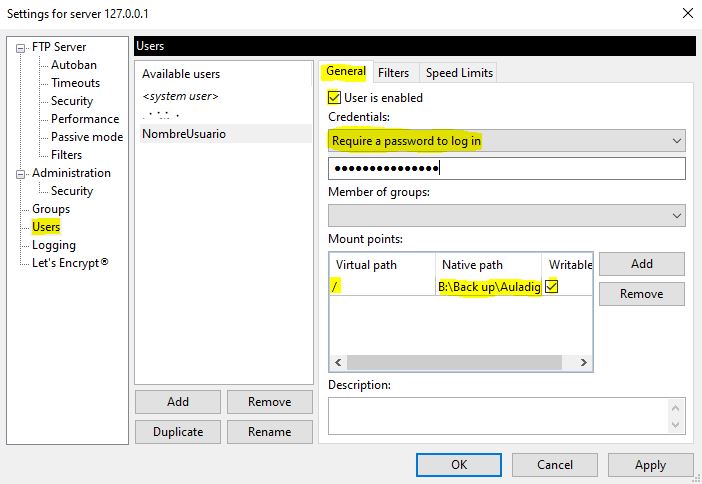
Being within an already configured group we do not need to make any further modifications, however FileZilla allows us to make specific configurations per user if desired.
We have already finished the user configuration. Now let's go with our team. As I mentioned at the beginning, we have a NAT router that generates dynamic IP addresses for both our local IP and the network IP. This in addition to having a network IP for all our computers on our local network, as you can imagine, this implies It makes it impossible for our client to connect to our server since the IP to which it connects can be from several different computers on the local network assigned to that IP. Therefore, we must configure passive mode in FileZilla, this will cause our router to receive a FTP request (port 21 by default) and return a series of ports so that the client can connect through one of these at random. To configure this we go to edit>settings and in the menu on the left we will go to passive mode settings:
Once there we are going to configure the ports through which we will allow the client to connect, the ports must be greater than 1024 since these are reserved for system protocols. Once the ports are selected, we activate the Retrieve external IP address from box, this box will allow us to use the IP we have, as it is a dynamic IP it will not always be the same, so we allow FileZilla to obtain it for us.
Once FileZilla is configured, we must configure our router to enable the ports that we have selected in FileZilla. We usually connect to our router using IP 192.168.0.1 in our browser. The credentials depend on each router and user configuration. If you don't know it, I recommend searching on Google for your router model. Once we enter we go to the port Forward section and indicate the ports that we just selected in Filezilla:
As you can see, we write the ports described above and direct them to the local IP of our computer. If you do not know what your IP is, open a command line (cmd) and write ipconfig, it is the ipv4 line.
With this we solve the problem of a single IP for our entire local network. The connection would be as follows:
Client connects through the network IP. The router receives it, through a port forward it determines which computer on the local network it should send the communication to with the ports selected in FileZilla.
Finally, we must configure the static (local) IP of our server, with this we ensure that the local IP will not change and the port forward would be sending the communication to an IP that is no longer being used. We must do this configuration on our router:
With this we are done. The remaining step is to connect through the client. The ip would be our network ip, How do I know my network IP?, the user we create on our FileZilla server along with its password and port 21 if your client requests it. If everything has gone correctly you will see a screen like this on your FileZilla Server with the respective status of the connection:
If at this point you get a connection error, the firewall is probably preventing the connection to your computer. To solve this, I invite you to see this Article
We have already tried with the IP we currently have, but what happens when our IP changes? For this we must use a dynamic DNS (DDNS) service. If you do not know this concept, I invite you to see this Aarticle, In short, this service will be responsible for updating the IP of our router and assigning it to a host name, so our client will no longer connect to a specific IP but to the host name.
We are going to configure our DDNS, for this there are many services, both paid and free, I recommend you review the options of your router to evaluate if the DDNS service is supported by your router.
Once validated we must enter our DDNS service and create the host name and assign it the current IP. Later we look in the configuration of our router for the DDNS option, select our service and enter the credentials. With this, the router can now connect to our DDNS service and update the IP to the host name.
With this we would have configured our Local ftp server.

